Do you know if the carabiners on your rack are right for what you're doing with them? If the HMS you use for belaying is the same one you should use on an anchor? If that wire gate you bought for its light weight holds the same as a solid gate? Most climbers buy carabiners based on price, color, or a friend's recommendation, but rarely stop to understand why each shape exists and what it was designed for. Here's the problem: a poorly chosen or mispositioned carabiner can lose up to 90% of its strength without you noticing. In this article we get to the point: what types exist, what each one is for, how much they hold according to the standard, what breaks them in real life, and when to retire them.
1. First things first: CE and UIAA certification
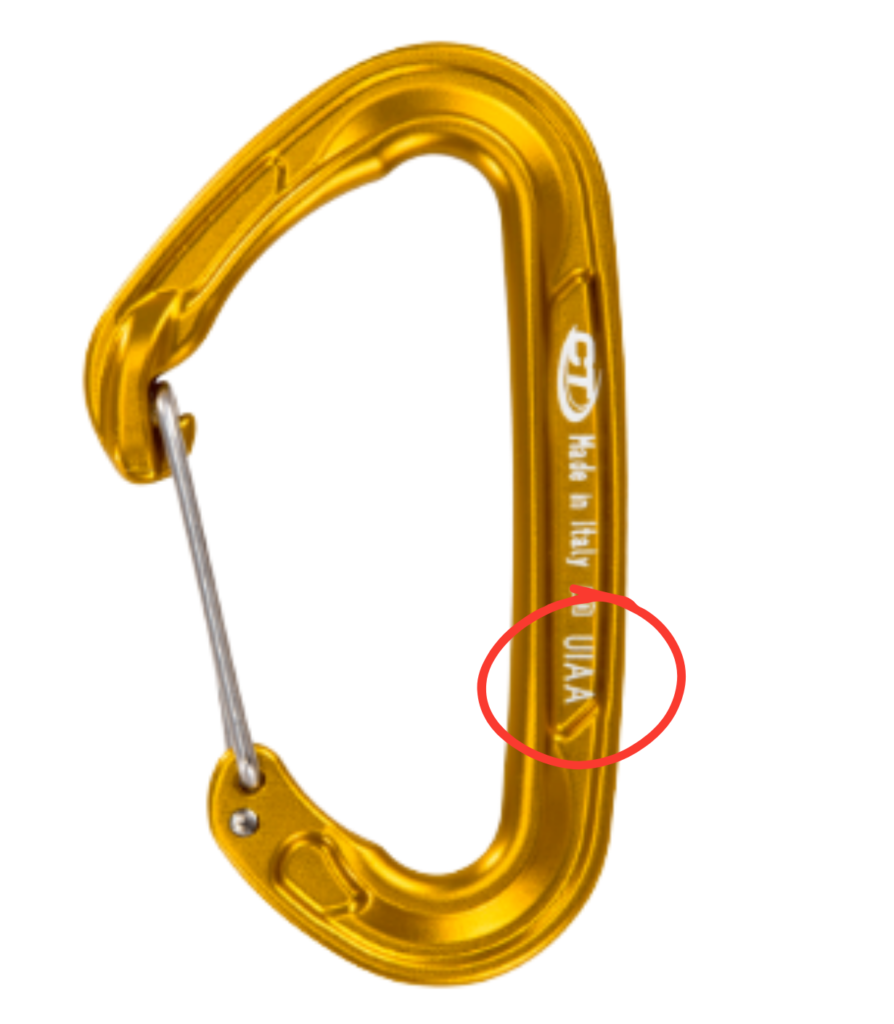
Before talking about shapes and uses, there's a basic filter: any carabiner that will be in the safety chain must be certified under the standard EN 12275 (European, CE) or UIAA 121 (international). That mark stamped on the carabiner body along with the letter indicating the type (B, H, K, X) guarantees that the equipment was tested and meets minimum strength requirements. Any carabiner without these marks, no matter how good-looking or cheap, must not be used for climbing.
Non-locking carabiners
These are quick-release, no-lock carabiners. The gate opens by pressing inward against a spring and automatically returns to the closed position. Their role is to allow quick clipping in situations where accidental opening is not catastrophic: quickdraws, runners to extend protection, alpine draws, and for cams, nuts, and other gear on the harness.
Gate types on non-locking carabiners
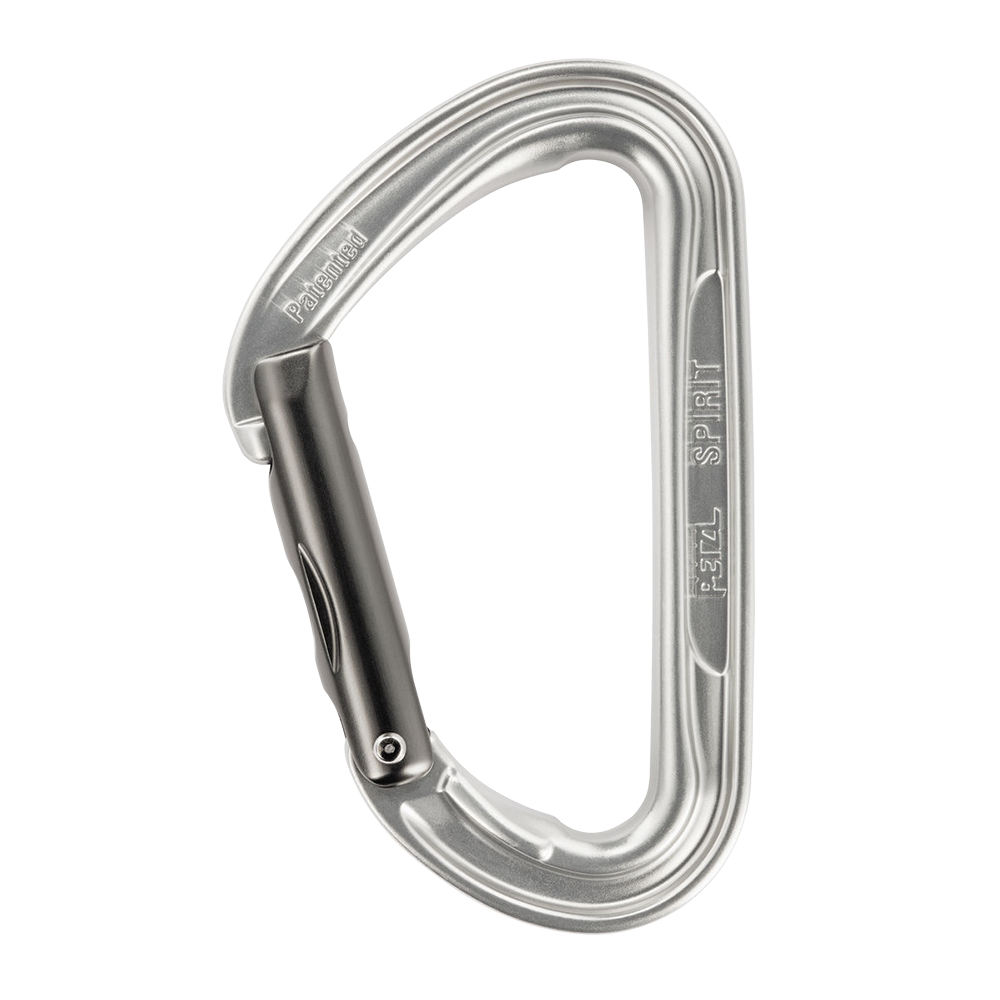
- Solid straight gate: the classic. More resistant than wire gate under transverse loads (because the gate body adds material when closed), but also heavier. Usually used as the top carabiner of a quickdraw, connected to the bolt.
.
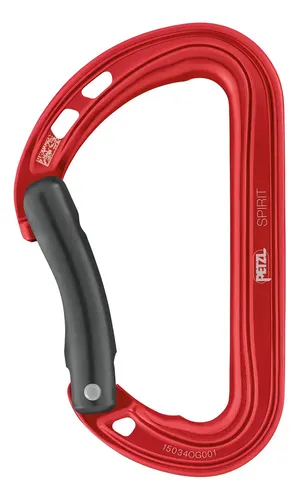
- Solid bent gate: same structure as the straight gate but with a curve on the gate. That curve guides the rope when clipping and makes one-handed clipping easier. Always used as the bottom carabiner of a quickdraw (the rope side).
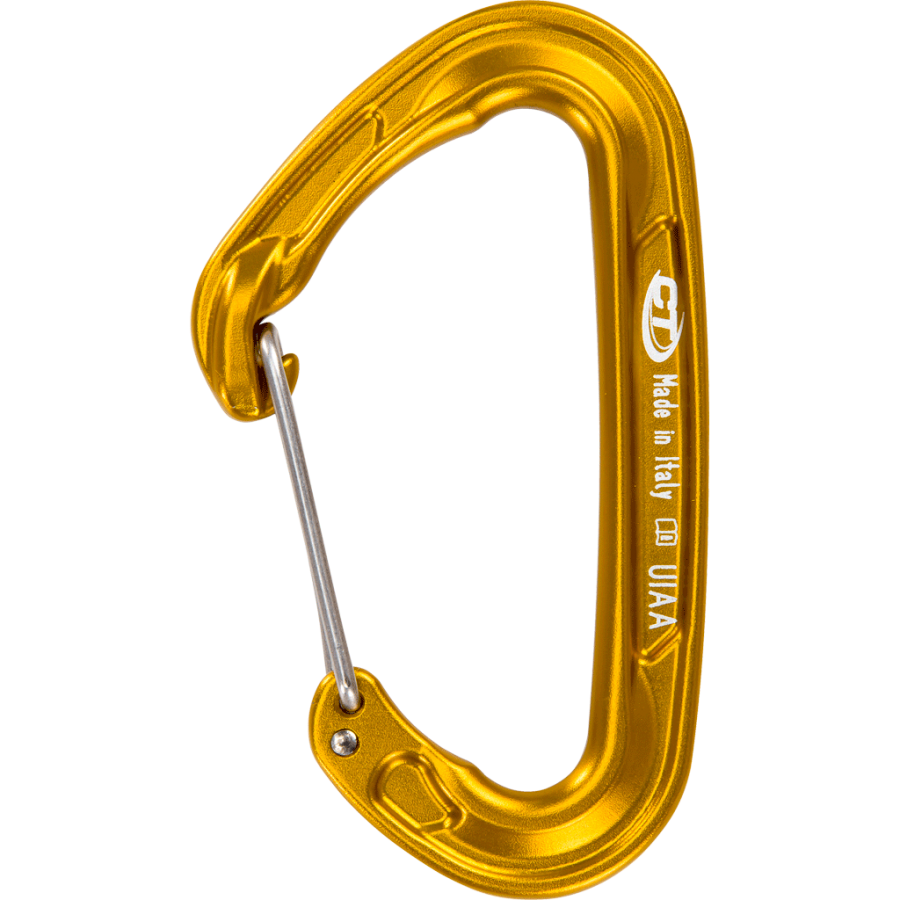
- Wire gate: a single stainless steel arc acts as the gate. Weighs 10–20% less than an equivalent solid gate, doesn't accumulate ice (key in ice climbing and winter alpinism). Black Diamond reintroduced this design to climbing in the mid-90s with their HotWire model.
The nose problem and how manufacturers solved it
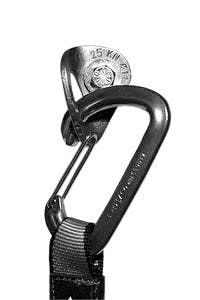
Here's one of the most technical and least-discussed points. Traditional wire gate carabiners have a hooked nose: a small notch where the wire gate catches when closing. That hook is necessary for force to transfer to the carabiner body… but it's also what catches on quickdraw slings, gear slings, cam wires, and even on the bolt when clipping.
Worse yet: if the nose catches on the bolt when the carabiner is loaded, strength drops to less than 10% of its rated value. Tests at the Black Diamond quality control lab showed carabiners in the nose-hooked position breaking under loads of just 2 kN —a load easily generated in a small fall or even a bounce test. If you see a carabiner in this position, it must be fixed immediately.
To solve this, manufacturers developed clean nose (keylock) designs compatible with wire gates. The best known are:
- Wirelock — DMM, 2002. First clean nose wire gate system on the market.
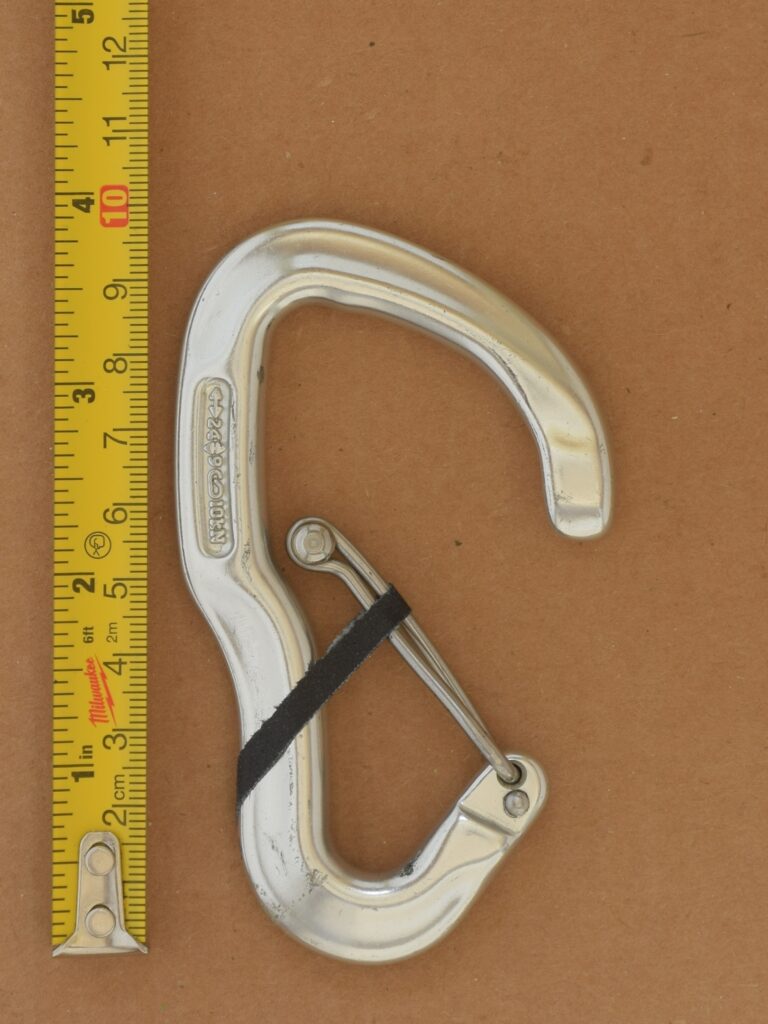
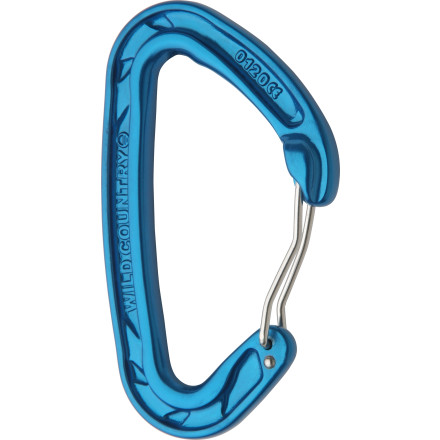
- Clean Wire — Wild Country, 2005.
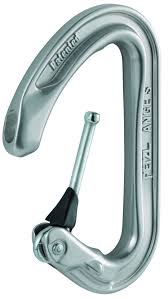
- MonoFil — Petzl, 2011. A single wire that fits into a smooth, notch-free nose (seen on the Petzl Ange, for example).
- HoodWire — Black Diamond, 2011. Small metal hood over the nose that covers the hook.
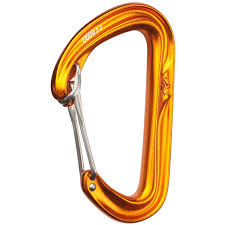
On modern solid gate carabiners, virtually all come with keylock (smooth nose, no notch). That's why they're cleaner for clipping and unclipping.
4. Locking carabiners
Here the gate is locked to prevent accidental opening. Used at all critical points where opening would be catastrophic: belay device connection to the harness, high-traffic anchors and belay stations, personal anchors, rappelling, life lines, and master points. There are two main families:
Screwgate
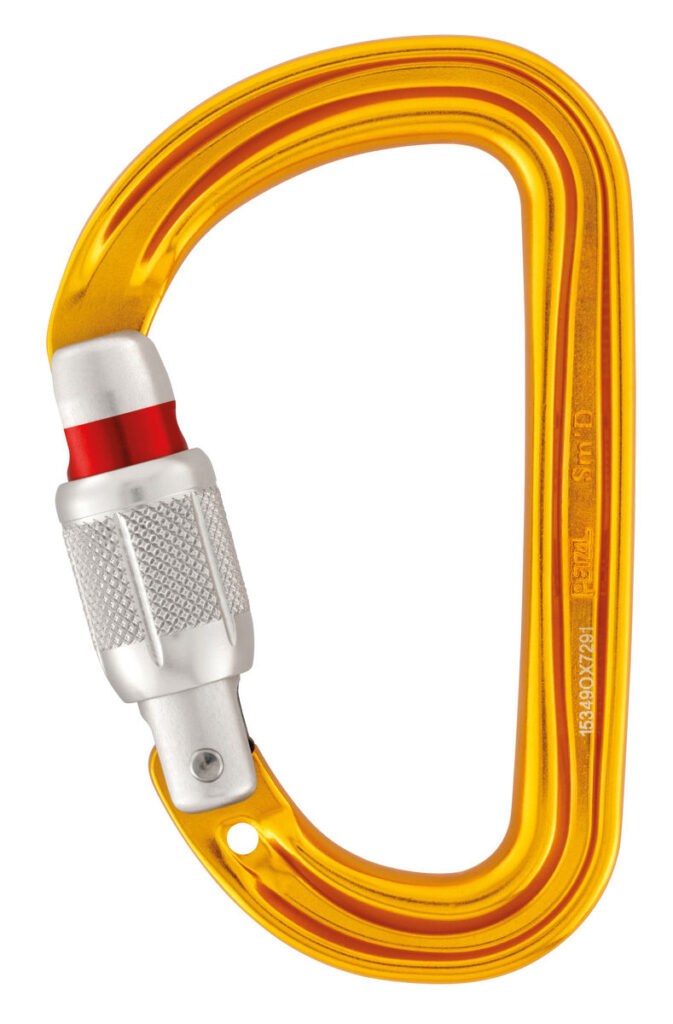
A threaded sleeve that is turned manually to lock the gate. It's the simplest system, doesn't jam with dirt or ice, and allows single-handed operation (for example, tying a munter hitch on a hanging carabiner). The downside: the sleeve can loosen on its own from rope vibration or rock friction, and sometimes tightens too much and is hard to open. For munter hitch belaying it's better to avoid the screwgate: the pivoting rope can unscrew it without the climber noticing.
Auto-locking (auto-lock)
These lock automatically when the gate closes. The most common variants are:
- Twistlock: two movements (twist and open).
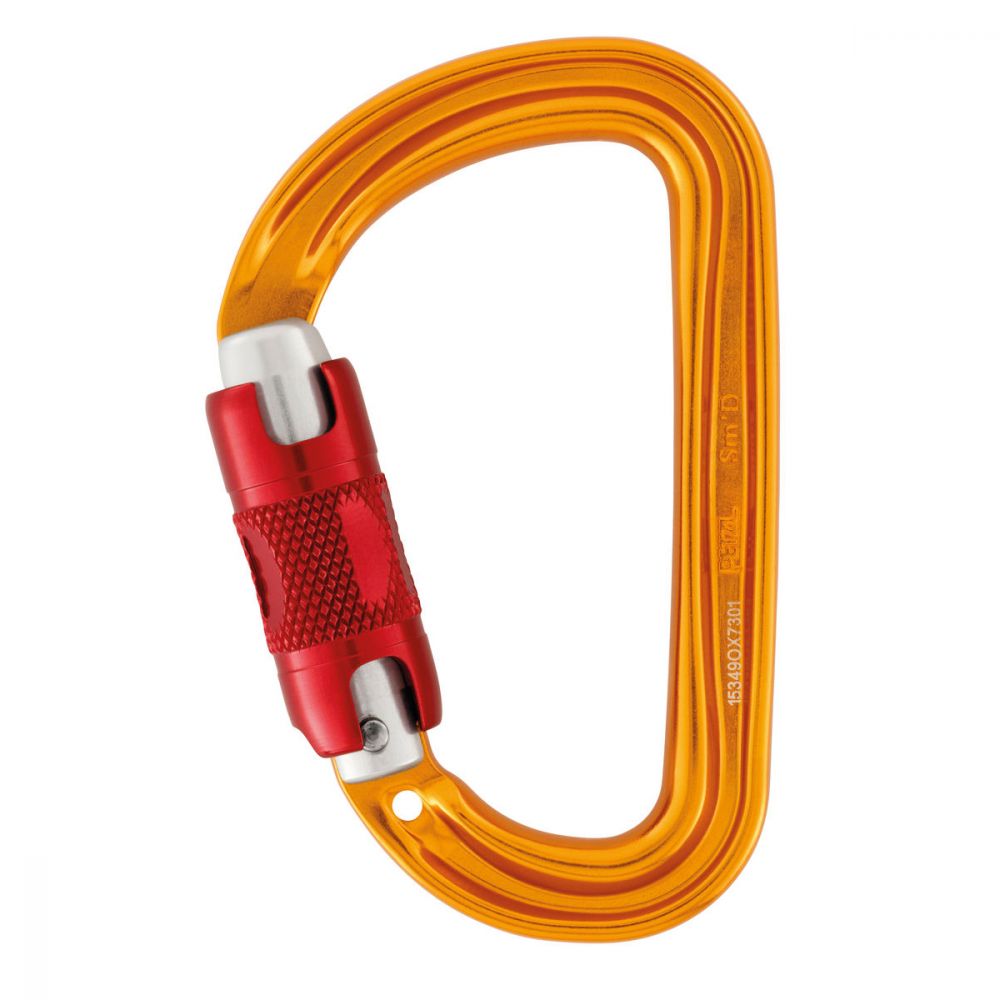
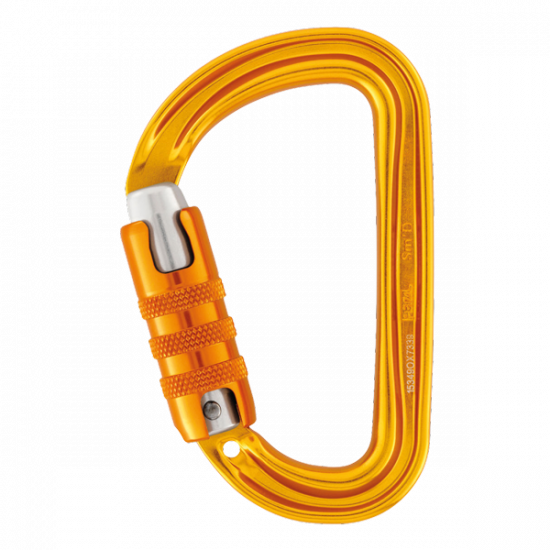
- Triple lock / Tri-act: three movements (push/pull, twist, and open). The most secure of the family, recommended for belay device connection and personal anchors.
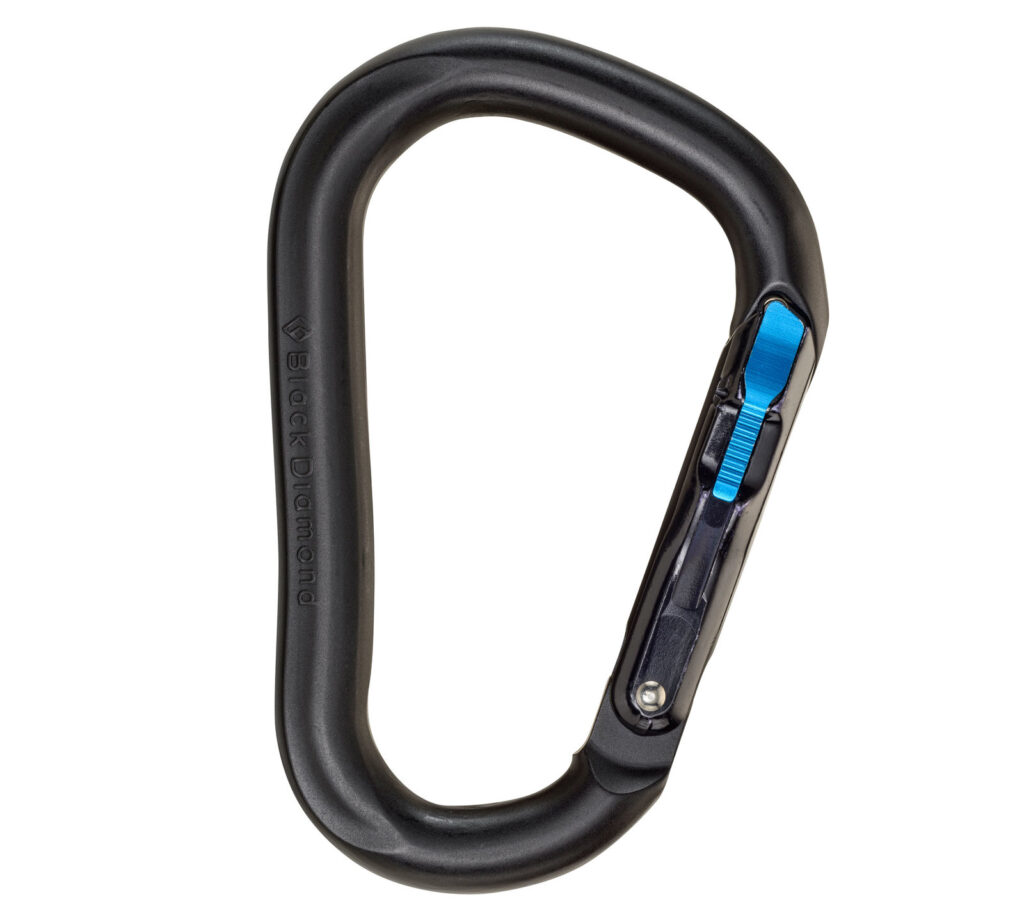
- Ball lock / Magnetron: special variants that require releasing a button or magnet before turning the sleeve.
For munter hitch belaying or when there's a real risk of accidental opening from continuous friction (intensive sport climbing, multi-pitch), auto-locking carabiners are preferable.
5. Shapes and uses: carabiners that actually apply in climbing
HMS — Type H (pear shape)
The name comes from the German Halbmastwurfsicherung, which means 'half-clove-hitch belay' (or munter hitch). They were specifically designed so that knot can pivot without jamming, thanks to the wide, rounded opening at the top.
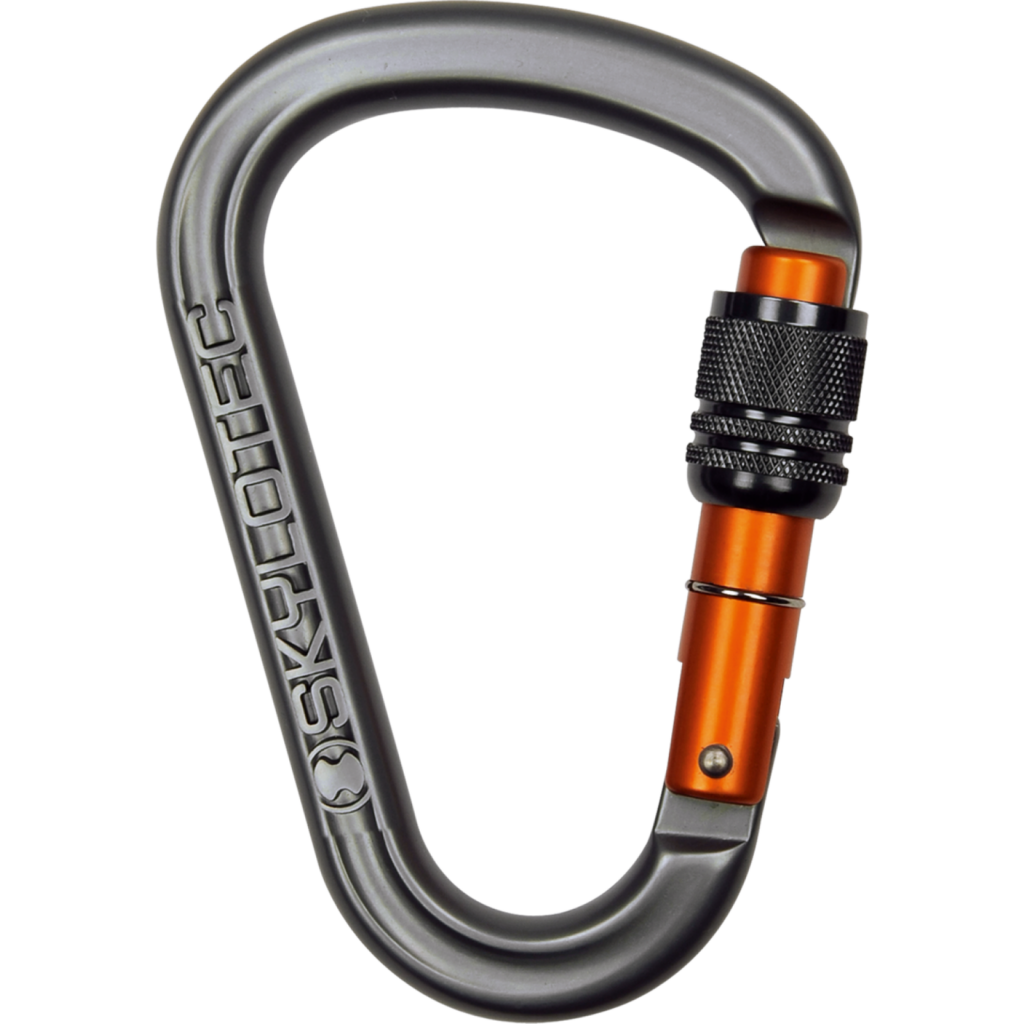
Main uses: belaying with a munter hitch, belaying with plate-type devices (ATC, Reverso), building the master point of an anchor, top-rope, and rappelling. The pear shape is more 'friendly' for the rope, offers a wide radius to reduce friction, and is considered the standard connector for everything involving dynamic belaying and rope friction.
Warning: due to its geometry, the load can sit away from the main axis (the spine), which reduces its strength—for example, when used with a GriGri.
For munter hitch belaying, always use a carabiner with a Triple lockclosure: with a screwgate, the pivot of the knot can slowly unscrew it.
Asymmetric or Type B (D-shape)
The asymmetric D-shape directs the load to the spine side, which is the strongest part under tension.
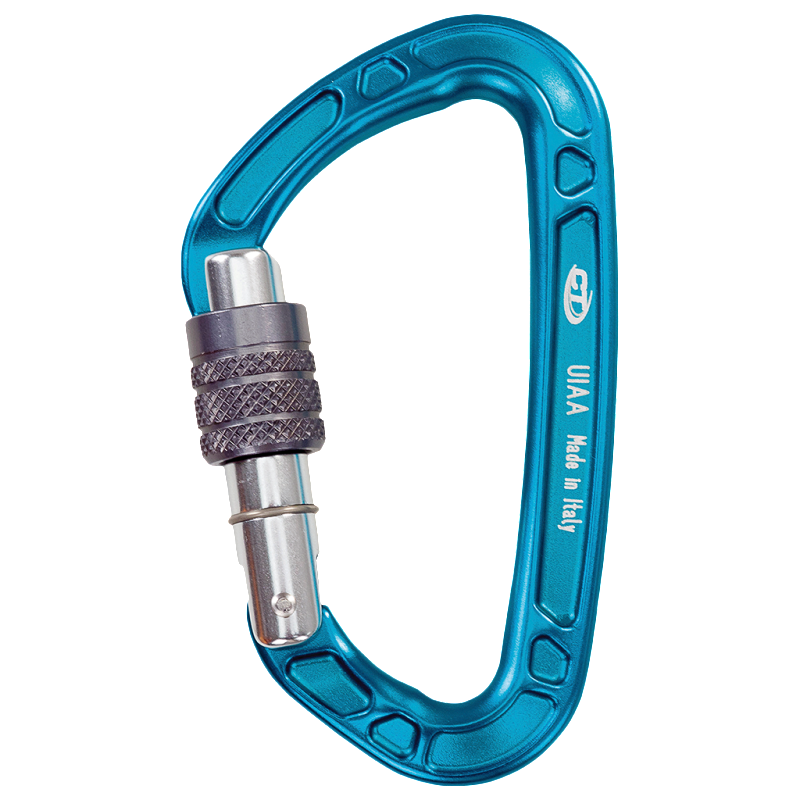
Main uses: connecting a GriGri or any assisted-braking device, fixing the rope to bolts at an anchor, anchors, and anchor tethers.
Important: Type B is not ideal for munter hitch belaying. The geometry causes the knot to jam against the gate.
Oval or Type X (symmetric)
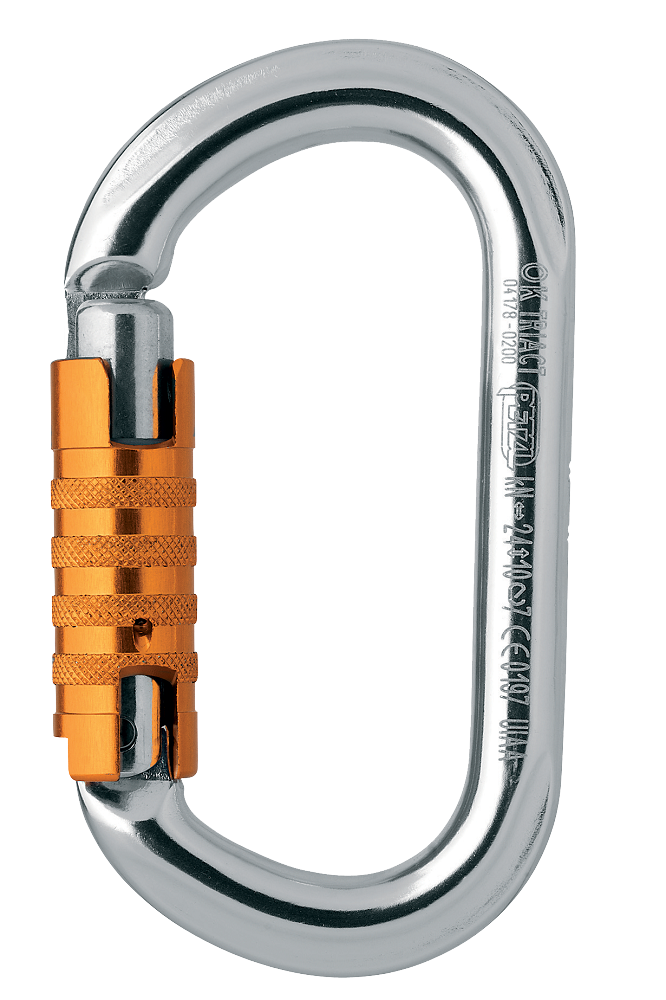
The traditional design, the first that existed. Since both arms are equal, the load distributes symmetrically on both sides, which prevents equipment inside (a pulley, a rope grab, a side plate) from deforming or sitting incorrectly.
Main uses: work with pulleys, rope grab devices like jumars, ascenders, microtraxion, prussik loops, connecting the GriGri, hauling, and rescue.
Quicklink or Type Q (maillon rapide)
No gate. These pieces open with a fully-closing threaded sleeve. No moving parts, so their strength is extremely high: a certified steel 8 mm quicklink yields 27 kN longitudinally and 10 kN laterally; a 10 mm one reaches 45 kN longitudinally.
Main uses: installing permanent lower-offs on a bolt, connecting chains to bolts at lower-off stations, leaving gear on unfinished routes, connecting elements that will remain installed.
Available in oval, D-shape, triangular (delta), and semi-round. For climbing, the oval is most common.
Certified quicklinks vs hardware-store quicklinks
Here's a point that gets little discussion but matters a lot. Quicklinks sold at hardware stores and big-box stores without a brand, are not certified for climbing use. They may have a number stamped on them, but that number means nothing in terms of quality control. They come without traceability, without alloy guarantees, without systematic testing, and without a user manual.
6. Rated strengths (EN 12275 / UIAA 121)
These are the minimum strengths required by the standard. Every certified carabiner must meet or exceed them. The actual values for most models are 10–25% above the standard.
| Type | About the activity | Major axis closed (kN) | Major axis open (kN) | Minor axis (kN) |
|---|---|---|---|---|
| B | Basic / asymmetric | 20 | 7 | 7 |
| H | HMS (pear shape) | 20 | 6 | 7 |
| X | Oval (symmetric) | 18 | 5 | 7 |
| Q | Quicklink (screwgate) | 25 | — | 10 |
7. How carabiners actually break in real life
The nominal 20 kN is a laboratory reference. In the field, carabiners almost never break from pure axial load with the gate closed: they break because they are mispositioned. These are the documented cases:
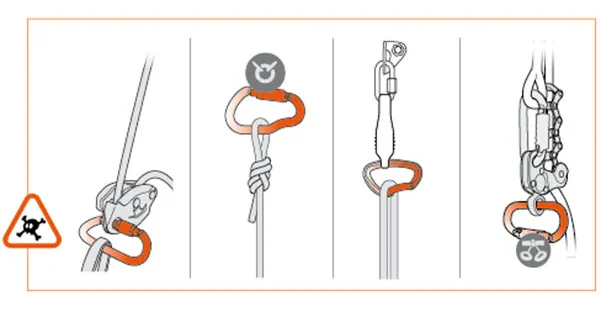
Transverse load (cross loading)
When the carabiner rotates and ends up loaded sideways, on the minor axis (the gate side). Strength drops to 35% of the axial value, around 7–10 kN. This happens when a belay device rotates inside the belay loop and ends up cross-loaded. To prevent it, use Type T carabiners with anti-rotation (a wire or plastic piece that keeps the carabiner in position) or systems like the Petzl Freino and Edelrid HMS Mago.
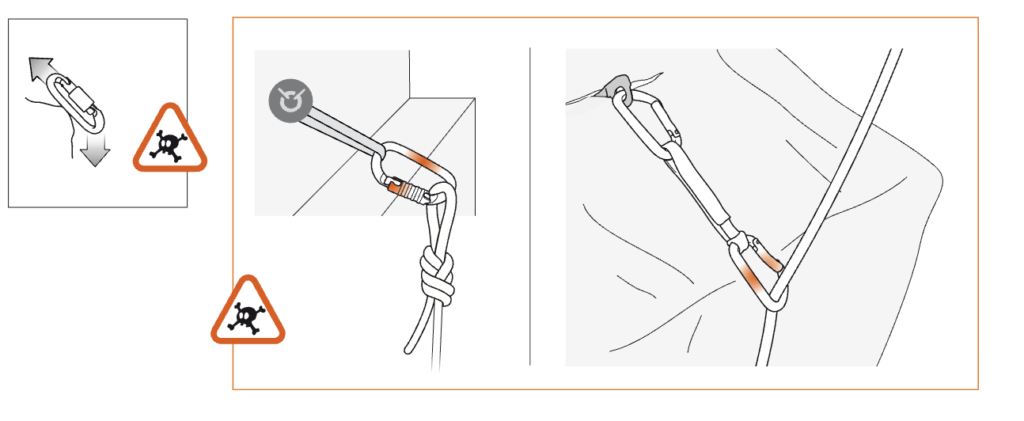
Edge loading
If a carabiner rests on a rock edge or on the horizontal edge of a bolt hanger, the load creates a lever arm. Strength can drop to 30% of the rated value.
Nose hooking
As discussed earlier: if the nose catches on the bolt and doesn't fully close, it breaks under loads as low as 2 kN. This is the most dangerous configuration because it can go unnoticed and only occurs on carabiners with a hooked nose. The structural solution is to use keylock or clean wire noses on bolts.
8. The other danger: worn carabiners that cut the rope
The repeated friction of the rope against the same carabiner—especially when lowering a climber and a sharp angle forms— wears down the aluminum and creates a sharp edge. Dust and sand in the rope greatly accelerate this process. On permanent quickdraws installed at sport climbing areas, wear concentrates in three places:
- First bolt of the route (belayer standing far from the wall creates a sharp angle).
- Crux bolt (many climbers hang and lower repeatedly from the same one).
- Misaligned bolts (rope runs at an angle).
When that groove becomes sharp, in a hard fall the rope can be cut.
Documented accidents
- Red River Gorge (USA): a climber fell while clipping the second bolt and the rope was completely cut by the fixed, worn, and sharp carabiner on the first bolt. Reported by the Black Diamond QC Lab.
- Czech Republic gymnasium: same mechanics—first bolt with a sharp carabiner, rope cut in a fall, the climber hit the ground. Fortunately, no serious injuries in either case.
- Mammut study (2012, still relevant): research that led the brand to publicly recommend retiring and replacing worn permanent carabiners at sport climbing areas. They showed that new ropes are cut in small falls when passing over edges formed by wear.
- Black Diamond QC Lab — cut test: worn carabiner with sharp edge + 80 kg + new 10.2 mm rope + hard fall with static belayer. Result: rope cut on the first fall, with a maximum recorded load of approximately 7 kN.
Here in Chile, permanent quickdraws are increasingly common at classic crags like Las Chilcas - Llaillay and Huasamacos – Valle de los Cóndores. That makes it critical for every climber to assess where they're clipping their rope, because no matter how good the sling looks, if the carabiner is worn, it will cut your rope!
9. When to retire a carabiner
Retire it without question when:
- It has sharp edges from wear (risk of cutting the rope).
- The gate doesn't close completely on its own.
- The sleeve or auto-lock system doesn't complete its locking cycle.
- It took a fall over an edge or was left in a lever position—even if it looks fine afterward (fatigue is invisible).
- It is deformed in the gate or body, even slightly.
- It has visible corrosion or was exposed to chemicals.
- The standard markings are missing or illegible.
10. Maintenance: cleaning and lubrication
A sticky gate is not an automatic sign to retire the carabiner: most of the time it's just dirt or lack of lubrication. The standard protocol (recommended by DMM, REI, and Petzl) is:
Cleaning:
- Blow dust and grit from the gate pin area (compressed air if available).
- Submerge or wash in warm water with mild soap or neutral detergent and scrub.
- Work the gate by opening and closing it several times under water to flush dirt from the spring chamber.
- Rinse with clean water.
- Air-dry hanging with the gate facing up, so water drains out of the spring compartment.
Lubrication:
- Apply one or two drops of lubricant to the gate pin, spring base, and the sleeve or locking system.
- Recommended: 3-in-1 or dry PTFE/Teflon-based lubricants (the kind used on bicycle chains).
- Avoid: WD-40 (it's a degreaser, attracts dirt, and removes the factory lubrication). Also avoid graphite on aluminum carabiners (can cause galvanic corrosion between the aluminum body, the steel pin, and moisture).
- Work the gate several times to distribute the lubricant and wipe away excess with a clean cloth.
Si después de limpiar y lubricar el problema persiste, el gatillo no cierra solo, queda lento o no completa el bloqueo, ahí sí se da de baja.
In summary
The carabiner is a simple-looking but technically dense piece of gear. Understanding four things covers 90% of your decisions:
- Locking at critical points (belay, anchors, belay stations, personal anchors).
- Non-locking on quickdraws, runners, and racked gear.
- HMS for everything involving a running rope: belaying, top-rope with rope passing through, rappelling, and master points.
- Asymmetric Type B for everything else: anchors, GriGri, fixing rope to a bolt, life lines.
And two non-negotiable rules: only CE or UIAA certified gear in the safety chain, and always inspect carabiners before going climbing. What you don't look at, you don't see.
What you just read is a fraction of what we cover in Andes to Pacific courses. In our climbing courses and private lessons, we make sure you understand all of this and more in detail—you practice it and work through it alongside our guides so you can make autonomous, informed decisions.
 English
  Español